Handheld or portable steam cleaners are a great tool to have around the house. There are so many hard to reach and hard to clean places in the home.
Having something in your cleaning tool kit that can take care of these spots quickly and without much fuss make owning a handheld steamer worth the relatively small price tag. If you haven’t purchased one yet, you can check out out our handheld steam cleaner reviews to see which one might suit your needs.
In reading these step-by-step instructions of how to use a steam cleaner, please keep in mind that there are many models to choose from, and you should also always read the enclosed safety and operating instructions.
Unpacking your steam cleaner
When you get your new steam cleaner home, take all of the parts and pieces out of the packaging. Some units are more put together than others at the time you unwrap them. Handheld steam cleaners generally require you to attach steam nozzles, utility brushes, and/ or a squeegee.
The steam cleaner should come with an instruction booklet or pamphlet with pictures of the parts and how they connect to the main unit. If you have a new handheld steam cleaner that is missing the instructions, call the 1-800 phone number on the unit or packaging. Most of the time the representatives are nice and knowledgeable about the product and can walk you through assembly in just a few minutes.
Once you get your steam cleaner put together and the necessary hoses and nozzles ready to go, you will always need to fill the machine with water. After all, that’s where the steam is made! You will always want to follow a couple of general rules when it comes to filling your handheld steam cleaner before use.
How to fill your handheld steam cleaner
- Place your handheld steam cleaner on a flat, level surface.
- Always make sure the electrical cord is unplugged!
- Remove the water basin cap. Most units label this as a “boiler cap” but they can be called many things. It’s the cap on the container that holds the water, and often they twist off in a counter-clockwise direction. *Please note, if you are refilling the water basin after the unit has been in use, you must wait for the steam cleaner to cool before removing the cap. Do not rush this step! Steam is hot and can cause injury if the unit is not allowed to cool between refilling.
- Fill a measuring cup (most of the time one is included with your new steam cleaner) with the correct amount of distilled water for your specific handheld steam cleaner. For instance, if your unit holds 6 oz. of water, only fill your measuring cup with 6 oz. of water.
- Pour the amount of water you pre-measured from the measuring cup into the water basin. If you need to use a small funnel to help aid in the filling process, do so. Do not overfill the water basin. Overfilling can lessen the amount of steam produced, make your unit less efficient, and also cause overheating.
- Twist the boiler cap back onto the water basin. Most lids will tighten clockwise. Double-check that is is screwed on tightly so that no hot water or steam escapes when the unit is in use.
After the water basin is full and the cap has been tightly screwed on, you are ready to start cleaning! Here are some general guidelines when beginning to use your handheld steam cleaner.
How to use your handheld steam cleaner
- Most units are equipped with a three-prong electrical plug. Be sure to use a grounded three-prong electrical outlet to plug in the unit.
- Some units with automatically begin to heat and others require you to flip an on the switch. Most units have a red indicator light that tells you the machine is heating. Look for the light when your unit is plugged in. If there is no indicator, turn the unit on by using the on the switch.
- After the unit is done heating, usually 3-5 minutes depending on which machine you have, the indicator light will turn off. This indicated the water is hot and you are ready to begin steam cleaning.
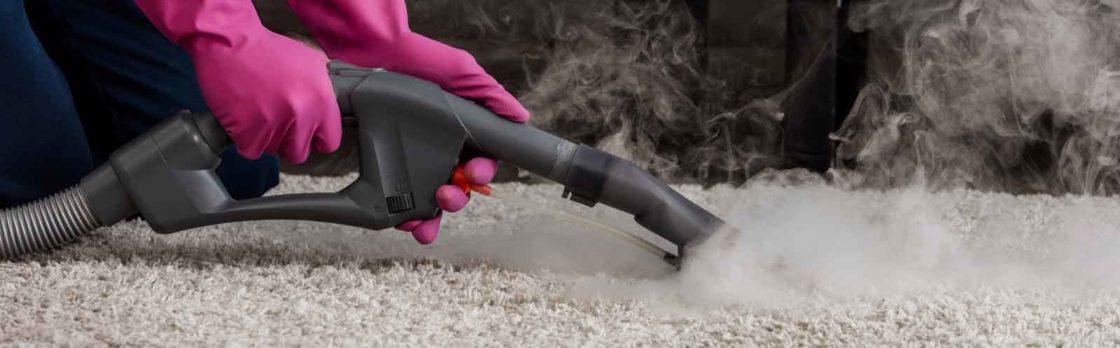
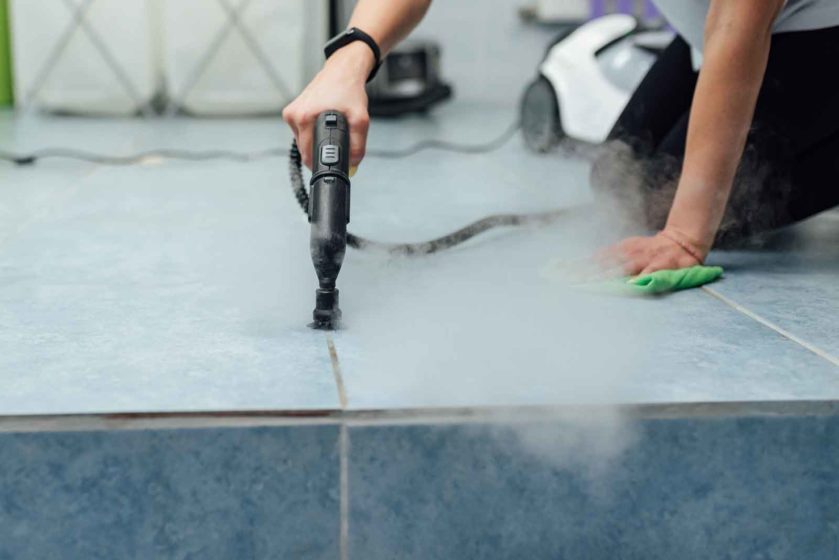
- Point the steam nozzle or accessory towards the item that you want to clean, and press the steam button or trigger. Most units require you to hold down the button or trigger for a continuous flow of steam. Always be sure you point the steam nozzle away from yourself, others, pets, or anything that can be harmed by the steam. Remember, steam is very hot and can cause injury if not used correctly.
- Use a slight back and forth motion over the area you are cleaning. You can also scrub the area if your unit has a utility brush connected. Steaming a non-porous surface (such as a shower wall) and then wiping the loosened dirt and grime with a rag is a great way to remove debris. Even though using a rag or clean cloth is generally recommended while the area is still wet, be careful to use caution because the surface area may still be hot.
Packing up
Use care when packing up the unit when you are finished cleaning. Following these simple steps will help keep your steam cleaner working as good as new for years to come.
- The type of unit you have will designate how long you can use your handheld steam cleaner before you run out of water to create steam. Once you are done cleaning, immediately unplug the unit and place it on a flat, level surface to cool.
- Generally, it takes between 30-45 minutes for a unit to cool. After the machine has cooled down, press the steam button to release any built-up pressure in the hose.
- Remove any attached accessories from the unit.
- Unscrew the boiler cap and drain the water basin into a tub or sink. Emptying the water will help avoid mineral buildup and prolong the life of your machine.
- Loosely replace the boiler cap. Do not fasten it down tightly, as this can make it difficult to remove when you use your machine the next time.
- Store your machine in a cool, dry location.