There’s no denying that many people clean the interior of their cars with a vacuum once in a while. However, when was the last time you deep cleaned your car seats? The wear and tear of everyday use can take a toll on your upholstery when you factor in the daily commutes to school and work trips with your furry family members and more.
Nevertheless, that’s not your cue to try out the various products and tactics to get your car interior spick and span, as that’s unwise. Besides causing unsightly damage, doing so can also significantly diminish your car’s resale value. Fortunately, you’ve come to the right place.
Read on as we dive into the lowdown on how to steam car seats. You’ll gain invaluable insight into protecting the car’s interior from harm, in addition to techniques that will help you get the job done to perfection.
Is It Wise to Steam Clean Car Seats?
Before you kick off the cleaning process, you might be a tad curious whether steam cleaning the car seats is a wise move. The answer is yes! However, it largely depends on the material. Nearly all cloth seats consist of one or more of the following steam-friendly materials.
- Nylon: It’s made up of fibers crafted from artificial plastics and is usually resistant to stains and heat
- Polyester: Besides its durability, polyester is UV-resistant and water-resistant
- Vinyl: Commonly known as polyvinyl chloride (PVC), vinyl is the flame-resistant plastic typically found in upholstery and automotive components
- Faux Leather: Usually made from polyurethane or PVC, faux leather is more resilient to heat compared to real leather. When in doubt, always double-check the car manual
- Real Leather: It’s the priciest car interior material which is why you need to proceed carefully. While you can steam clean car seats made of real leather, avoid doing so frequently as excess heat and moisture will shrink the material in the long run, causing creases
How to Steam Clean Car Seats
Here’s a step-by-step process of how to get started.
1. Purchase or Rent an Appropriate Steam Cleaner
There’s no denying that steam cleaners come in various shapes and sizes. If you already own one, ensure it comes with a soft-bristle brush or fabric steamer attachment, such as the Vapamore MR-75. If you prefer to invest in one exclusively for your vehicle, keep the following criteria in mind.
Tank Capacity
If you own an SUV, van, or large van, you might want a bigger tank capacity to avoid the hassle of refilling every few minutes.
Necessary Components
A fabric attachment or accessory is required for a fabric car seat. After all, you want to clean your upholstery evenly. Nozzles that blast concentrated steam are unsuitable for getting the job done. Furthermore, you’ll also want a brush head attachment that comes in handy for scrubbing.
2. Prepare Your Garage or Check the Weather
Condensation is an inevitable product of steam. After all, it is vaporized water which means the hotter the steam, the less condensate will be generated. Despite the heat of the steam, your car seats are likely to be slightly damp once the cleaning process is complete.
Therefore, the clean upholstery will require ample time to dry. After all, the last thing you need is mold developing in your car’s interior. If you don’t have access to a garage, you should plan the cleaning the steam cleaning process on a warm, sunny day, early in the morning.
3. Vacuum Meticulously
Take the time to remove unnecessary items and junk in your car before meticulously steam cleaning the seats. The last thing anyone wants is to accidentally steam-melt forgotten pieces of plastic or candy. As you do so, ensure the head of the vacuum cleaner or crevice tool gets into all the nooks and crannies of the car’s interior.
4. Pre-Treat Stubborn Stains
If you have stubborn stains such as spilled tea, coffee, stew, sauce, or soup, you’ll need to pre-treat them before steam cleaning. By doing so, you’ll elevate your chances of successful removal. Find a suitable pre-treat cleaner or upholstery cleaner that’s compatible with the fabric of your car seats.
You can also use a cleaning solution made of baking soda and warm water. Mix the solution in a spray bottle and spray it on the stain. If it is a difficult stain, let the baking soda and water solution sit on the stain for 30 minutes. You can also use white vinegar mixed with baking soda and blot the stain with a clean cloth before steam cleaning the car’s interior.
5. Prepare Your Steam Cleaner
Now that your car is free of junk or trash, it’s time to get ready for action. Fill up the tank of your steam cleaner and turn it on as per the manufacturer’s instructions and wait for it to be ready for use. Depending on the model, the waiting time might be anywhere between 30 seconds and 5 minutes.
As you wait, have your fabric steamer attachment and soft-bristle brush within arm’s reach. If the fabric steamer attachment came with a protective cloth, remember to put it on. As a tip, use soft brushes to steam clean your car seats. Using rigid or metallic counterparts leaves the fabric susceptible to scratches.
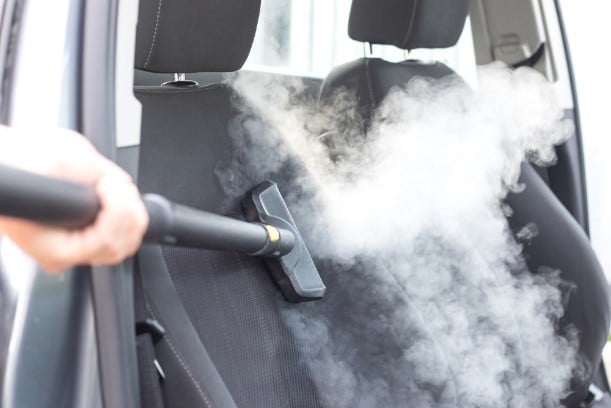
6. Begin the Steaming Process
You’ll notice the close similarity between manipulating a vacuum and handling your steam cleaner. Once you decide whether to begin at the front or the back, you can implement the tips below.
Top to Bottom
Avoid the unpleasant feeling of kneeling on damp car upholstery by steaming the top of your car seats as you slowly and evenly work your way down.
Steer Clear of Metal Components
Avoid steam cleaning metal parts such as zippers around or in your car seats. Doing so leaves them susceptible to rust, particularly with frequent steam cleaning.
Move Slowly In Straight Lines
Slowly swipe your fabric steamer across the seats uniformly in smooth lines as opposed to sporadic motions.
Gently Scrub Out Stains
If you encounter residual stains, switch the attachments, and use your soft-bristle brush to tackle them. As you do so, resist the urge to focus on one spot indefinitely or apply excessive pressure.
Wipe the Car Seats
Run a clean microfiber cloth across the steamed areas to get rid of excess moisture.
As you begin the steam cleaning process, work fast with your steam cleaner while avoiding hovering in one spot for too long. Keep in mind that excess moisture and heat may damage the car upholstery.
7. Allow the Seats to Dry
Once your seats are steam cleaned, give them anywhere between 3 and 5 hours to dry. As you do so, leave the windows open and park in a sunny and windy spot to fasten the process. You can also use a fan to speed things up.
8. Final Touches
You have free rein to use a leather conditioner on your faux or real leather car seats for a glossy luster. For a pleasant, new car aroma, spray an upholstery-compatible freshener on the seats. If you are steam cleaning leather seats, make sure not to do it too frequently. Too much moisture and heat can begin to shrink leather over time.
Conclusion
Now that you know the ins and outs of how to steam clean car seats, doing so relatively often (once every four to six weeks) is a worthwhile endeavor. Steam is perfect for sterilizing surfaces, protecting you and your loved ones from germs. It’s safer and requires less elbow grease compared to using a sponge to scrub your upholstery.
For some people, using a steam cleaner is oddly satisfying. If you fall into this category, there’s a high likelihood you’ll look forward to the task rather than dread it. Lastly, always exercise caution by keeping the cleaning brief and avoid using steam cleaning products you’re uncertain of.